How Our Handmade Ceramics Are Made: A Potter’s Step-by-Step Craft.
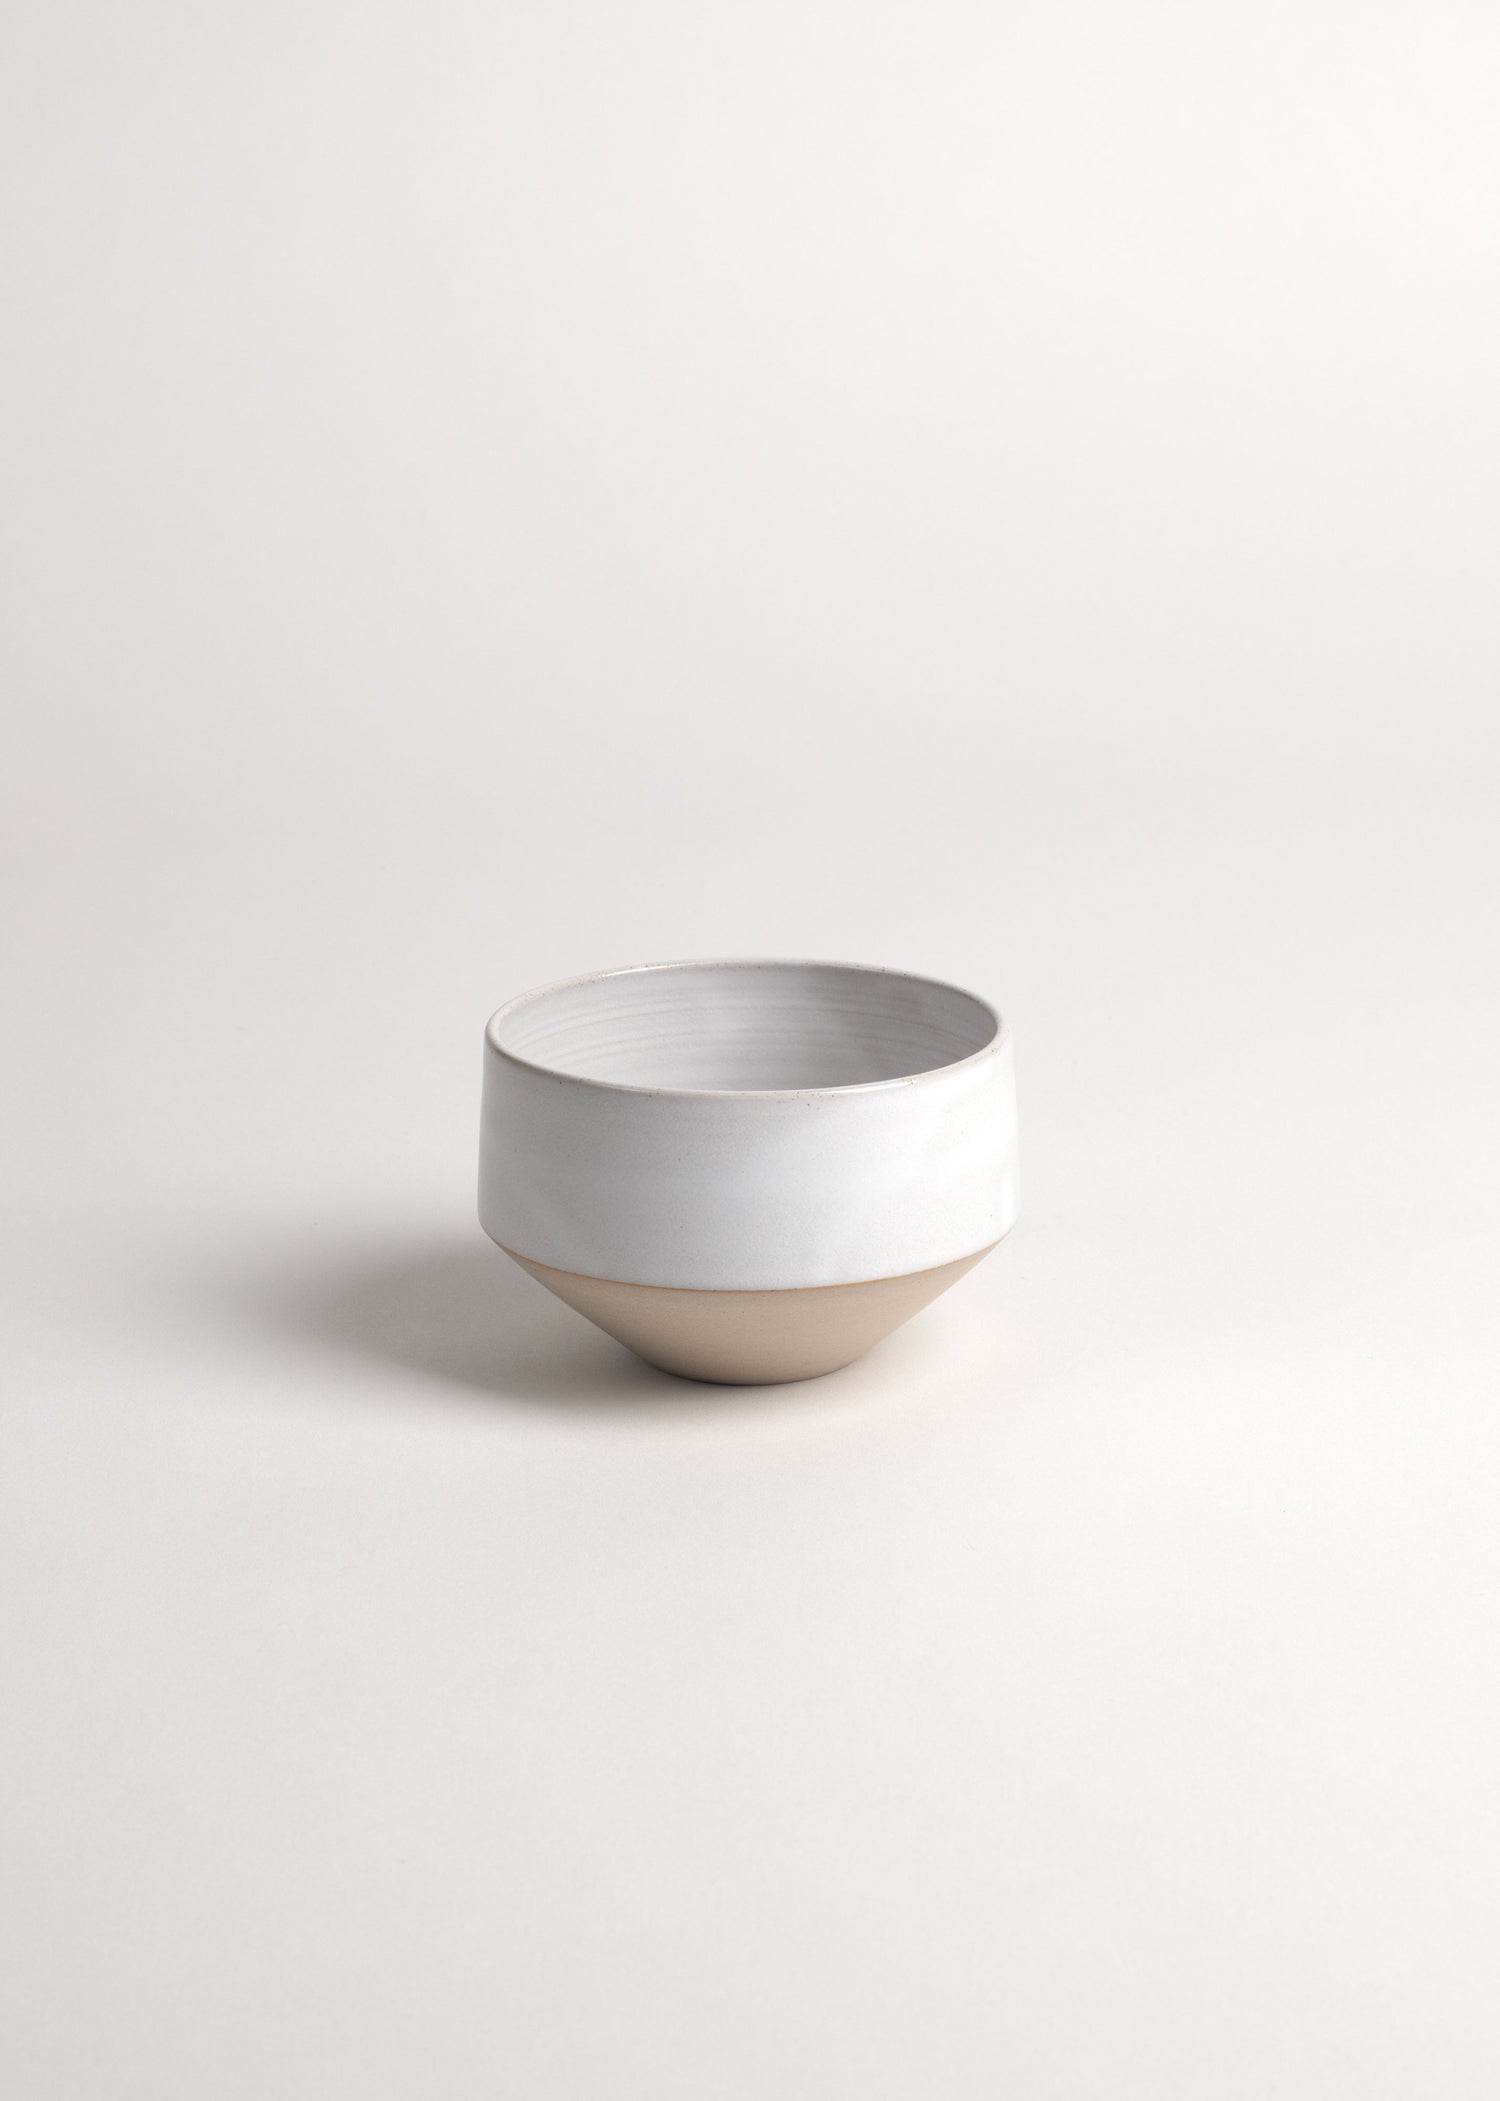
The JUN coffee cup below may appear simple, but it’s the result of a dozen meticulous steps, all done by hand. In this article, we take you through each of these steps, offering a true dive into the potter’s craftsmanship!
PREPARING CLAY: WEDGING AND KNEADING
Once the right clay is selected, it’s prepared, meaning it is kneaded thoroughly to expel any air trapped within. The process resembles that of a baker kneading dough. It’s a physical and crucial step, laying the groundwork for all those that follow. For instance, when making a plate, poorly prepared clay will inevitably crack during drying or explode during firing.
Once the clay reaches a uniform consistency, the ceramicist divides it into several balls, each weighed according to the specific piece to be made. These clay balls are then covered with a tarp to prevent premature drying.
THROWING PROCESS : SHAPING CLAY
Most of our ceramics are made from stoneware, shaped on a potter’s wheel. Trays are crafted using slab construction, while jugs are made through slip casting. Other techniques—such as coil building, pinching, or stamping—are also part of the potter’s repertoire.
Here, we’ll focus on throwing, the technique we use most frequently.
The potter’s wheel is essentially a large basin with a rotating plate at its center, known as the wheelhead. Most modern wheels are motorized, allowing for precise speed control, though some are still powered by a foot pedal connected to the wheelhead.
A circular, perfectly flat wooden batt is placed on the wheelhead. If the batt isn’t flat, making a plate—such as our straight-edged model—will result in a warped or wobbly piece.
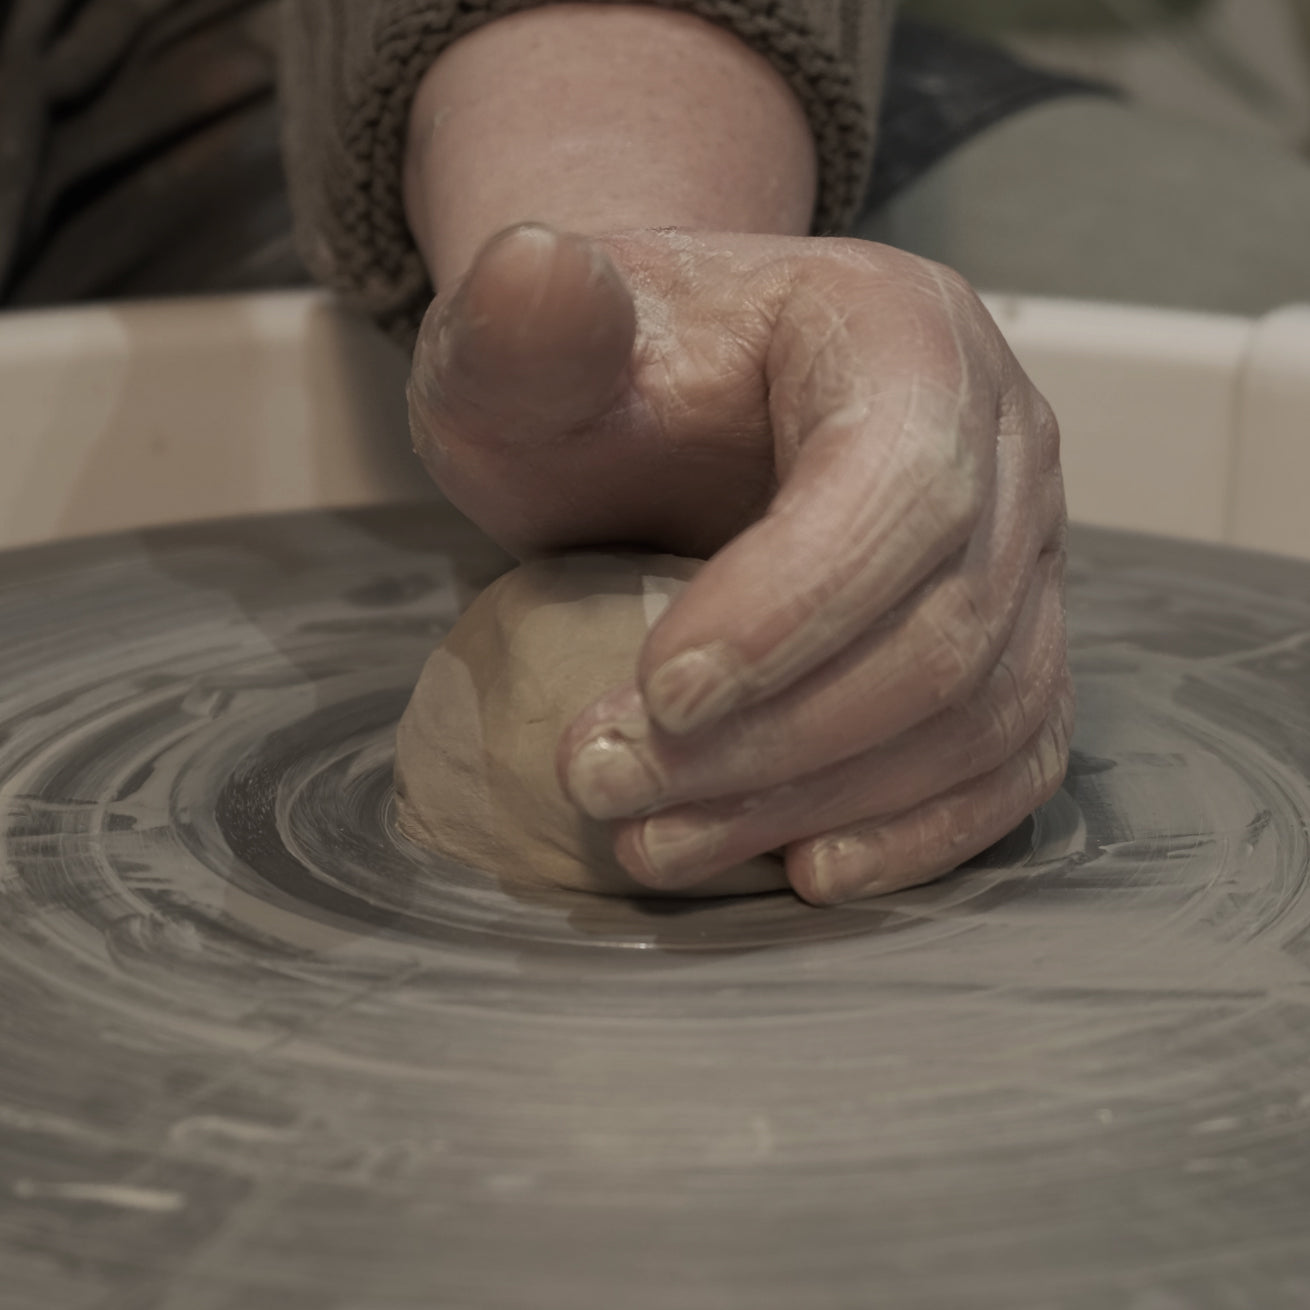
The clay ball is then thrown onto the wheelhead and carefully centered to allow for even wall formation.
Once centered, the clay is raised and lowered several times with added water—a technique called coning. This helps with proper centering and ensures any remaining air pockets are eliminated.
We then open up the clay by pressing into the center with both thumbs, forming a well, then pulling the base outward in a single, steady motion. From there, once the base is formed, we pull up the walls by pinching and lifting the clay upward. This is followed by a series of delicate adjustments using the knuckles and fingertips. Next, a sponge and a rib—a flat tool—are used to smooth and clean up the walls. When producing pieces in series, as we do, both throwing and the later trimming stages are paused multiple times to measure diameters, heights, and wall thicknesses. We also refine the rim according to the piece’s intended function.
At this point, the piece has its form but remains rough. It is cut from the wheel using a potter’s wire in one continuous motion close to the base, then gently lifted off and placed on drying racks. It’s left to dry until it reaches a leather-hard consistency—firm enough to handle without distorting the shape, but still pliable enough for further work.
TRIMMING AND THE FIRST FIRING
Once the piece reaches the leather-hard stage, it returns to the wheel for trimming. This is when we shape the foot, if the piece is meant to have one. A sticky pad is placed on the wheelhead to hold the piece in place, and a series of careful movements follows, using ribs and various tungsten carbide tools designed to carve and refine the clay. This stage gives the piece its final shape and finish.
Depending on the complexity of the object, trimming can be quite detailed and time-consuming—especially for intricate forms like our TONDINO plate.
Once trimmed, the piece is left to dry completely before the first firing. The drying time depends on the object’s thickness and can range from a few days to several weeks. For example, the individual components of our Navona candlestick require over ten days to dry fully.
After this stage, the piece is ready for its first firing. Once fired, it becomes what we call bisque—a porous ceramic that has been hardened but not yet glazed.
GLAZING
All our glazes are made in-house. We currently use over a hundred different recipes—each a precise blend of various minerals such as copper oxide, iron oxide, and more. Each recipe determines the final color as well as the surface texture and visual effects that develop in the kiln.
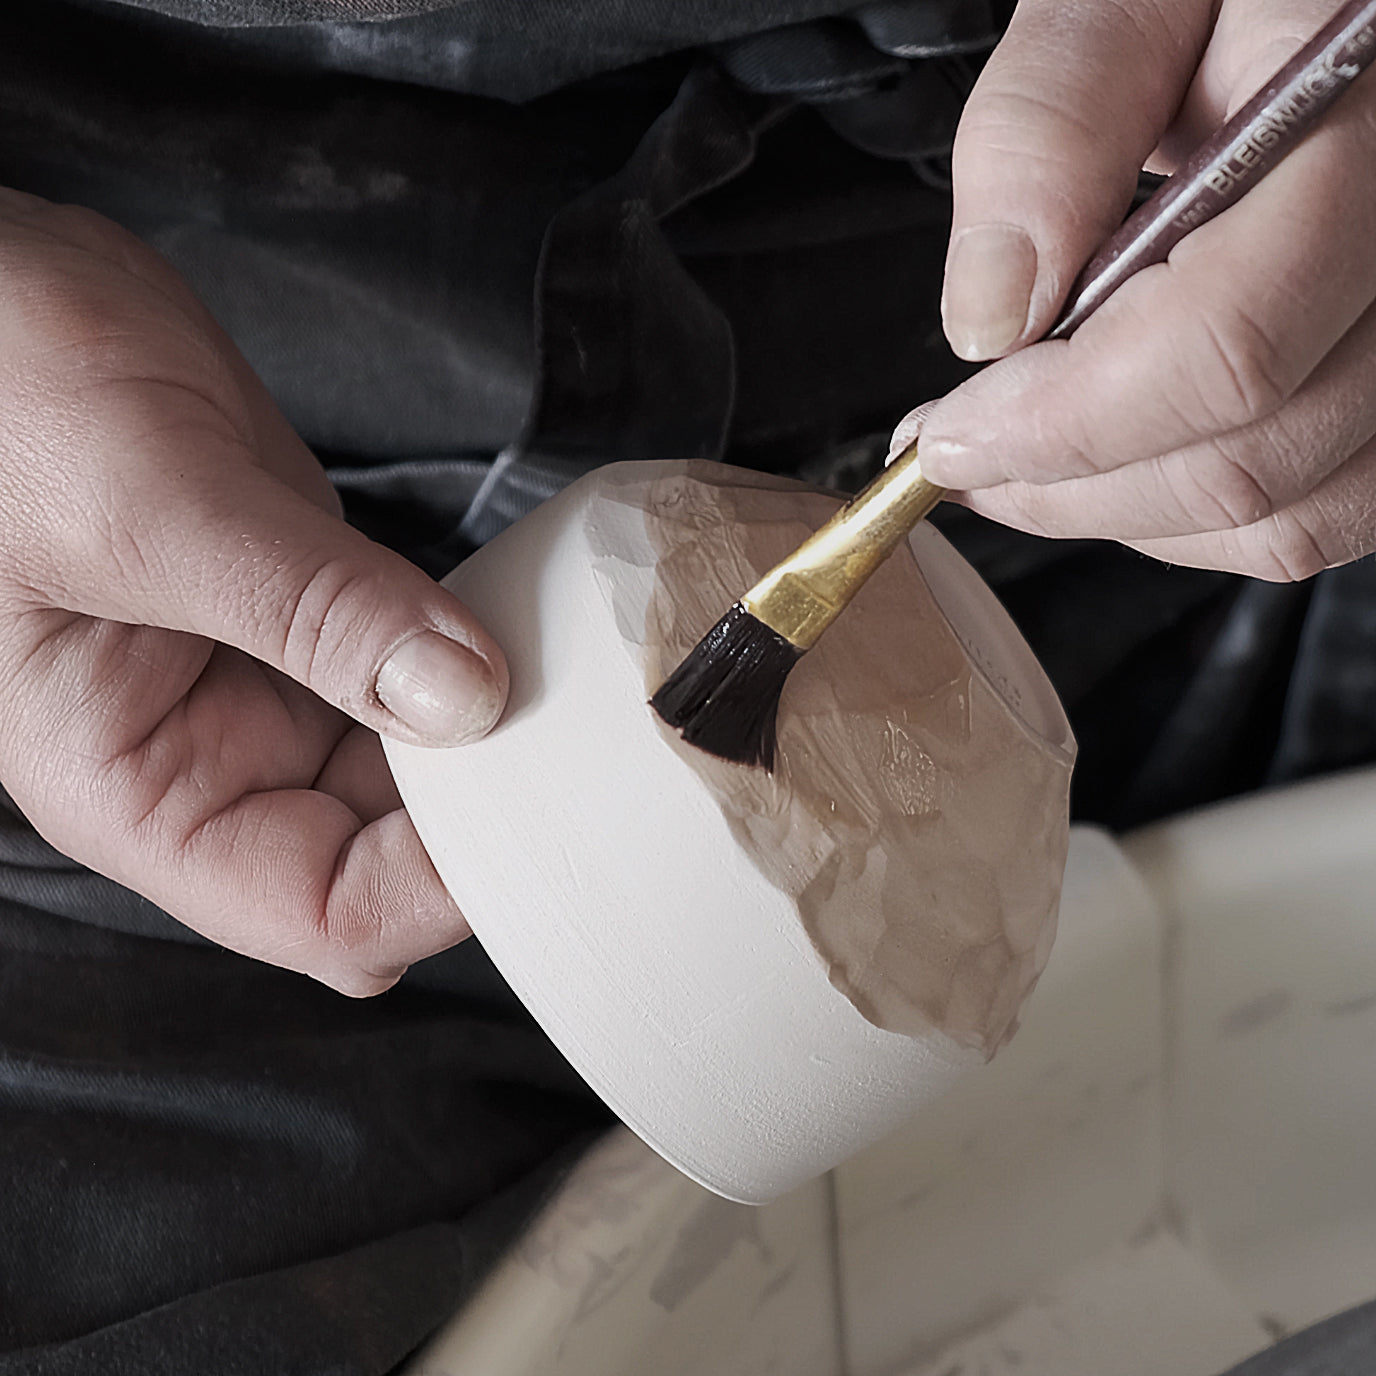
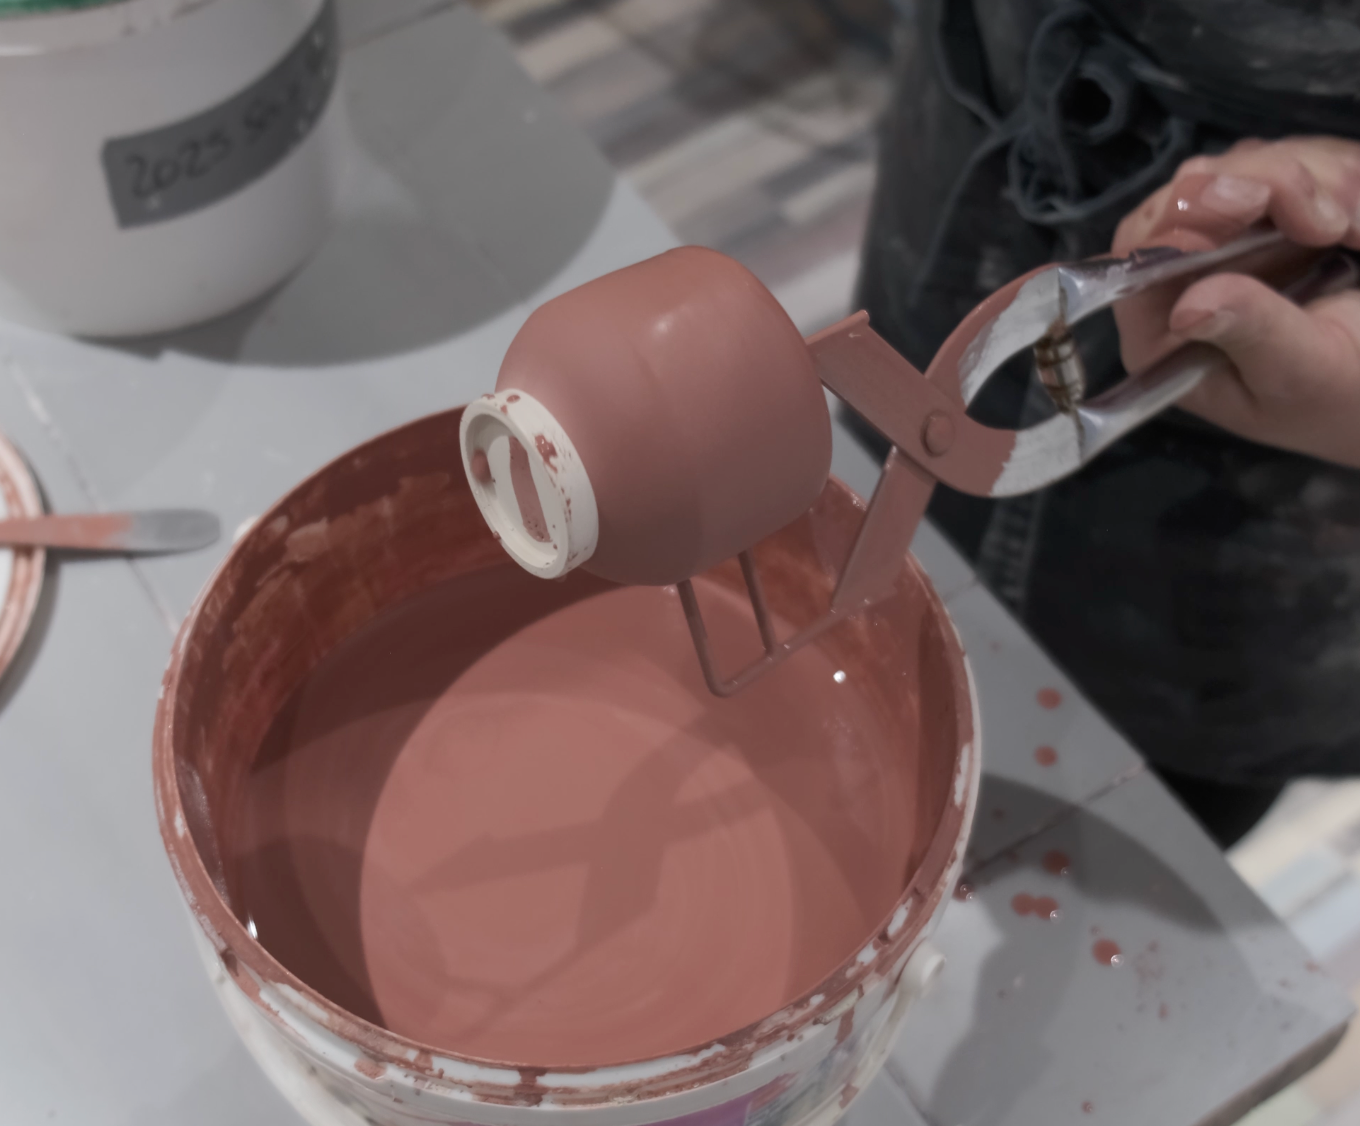
At the workshop, we mainly use dipping and spraying methods. For certain models, like our KURINUKI coffee cups, we apply a layer of wax to the base by hand to keep it raw and ensure that the glaze doesn’t adhere.
Glazing is a craft of its own. It requires rigorous study, technical knowledge, and meticulous execution. The final color and finish are influenced by a multitude of variables: the type of clay, the glaze recipe, the application method, the number of glaze layers, the shape of the object, the firing method, the presence or absence of oxygen during firing, and even the object’s placement inside the kiln.
While we document and archive all these factors carefully, we also embrace the element of unpredictability. This openness to surprise and imperfection is part of what defines craftsmanship.
THE SECOND FIRING
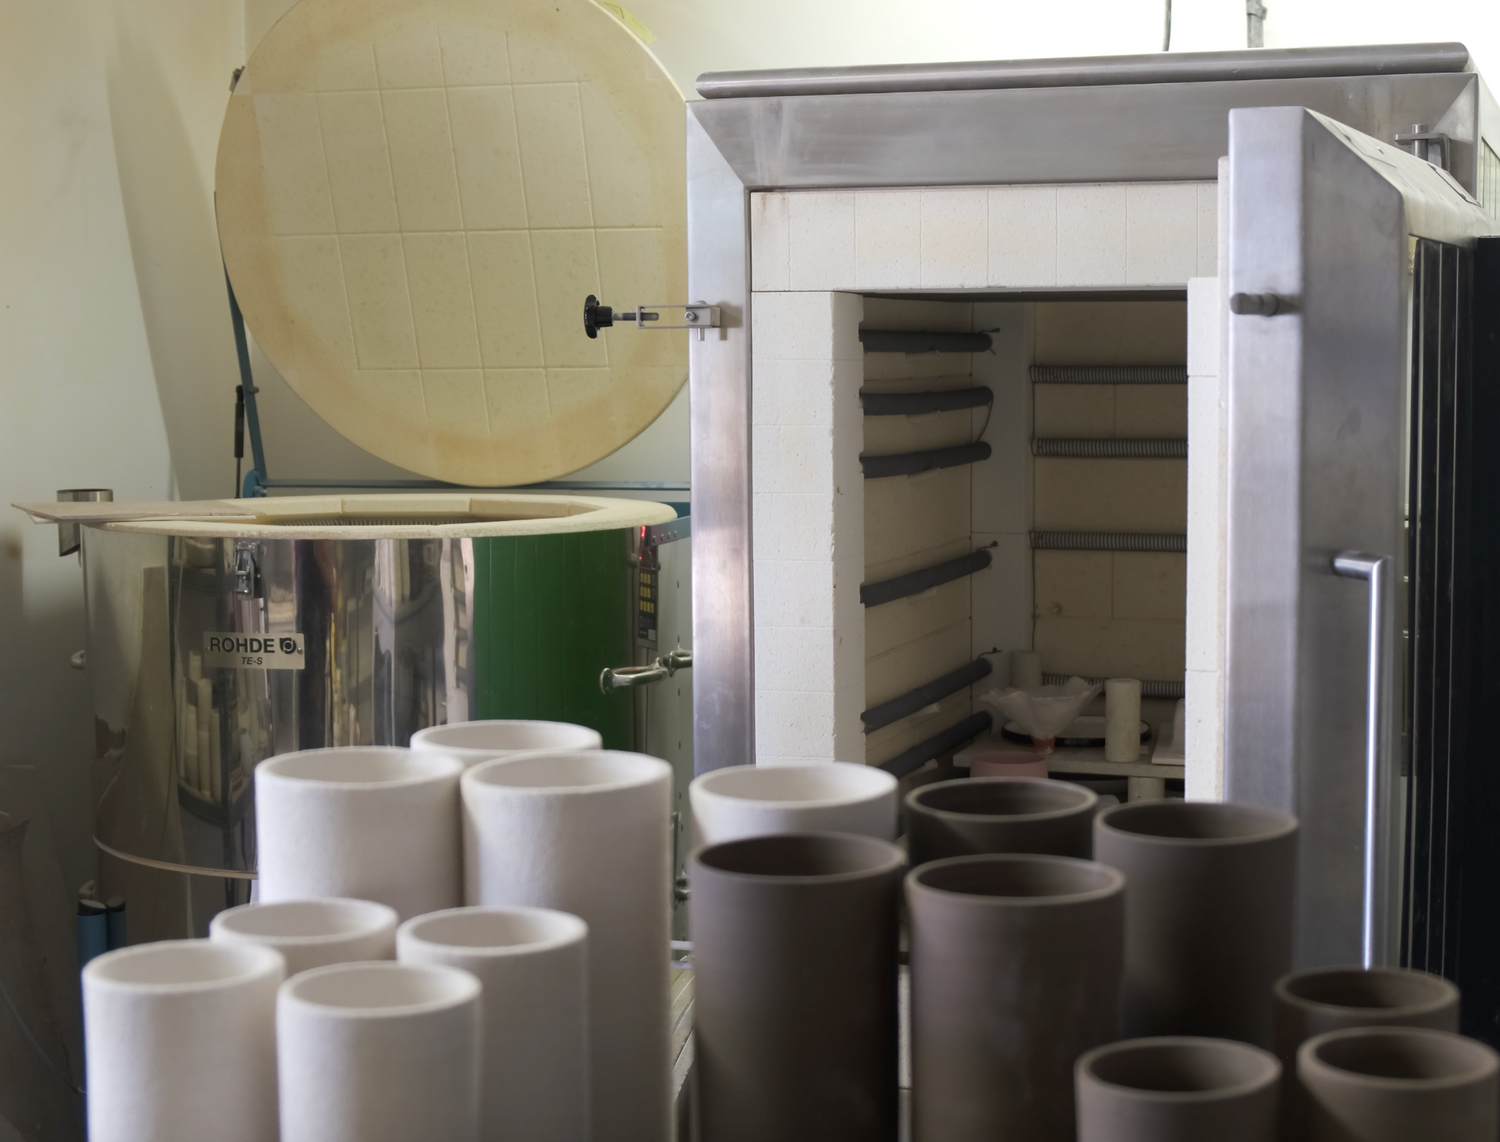
Once the glazed pieces are fully dry, they’re ready for the second firing.
In our studio, this firing is known as a high-fire, reaching temperatures close to 1300°C (around 2370°F). We use two types of kilns: electric and gas. The firing process takes several days, depending on how gradually we bring up the temperature and allow the kiln to cool.
Once the kiln is opened and the pieces have cooled, they are finally complete. However, certain creations may require a third firing—particularly when a decorative detail or a decal (chromo) is applied over the glaze.
What sets our workshop apart is the care we bring to every aspect of production, both in our tableware and decorative pieces. While the handmade nature of our process naturally results in variations in shape, size, and color, we believe that craftsmanship should never be used as an excuse for careless work or unnecessary shortcuts.
We work exclusively with high-quality raw materials that comply with the strictest standards of our craft. We take the time to design and produce each object thoughtfully—sometimes even adding extra steps to improve the touch and functionality. For example, we hand-sand all unglazed surfaces on our cups and bowls so they feel smooth to the touch. The undersides of our plates, though rarely seen, are also carefully finished—for better grip, balance, and comfort in use.
A fully handmade piece takes time. We believe its final quality should always reflect the value of that time.